






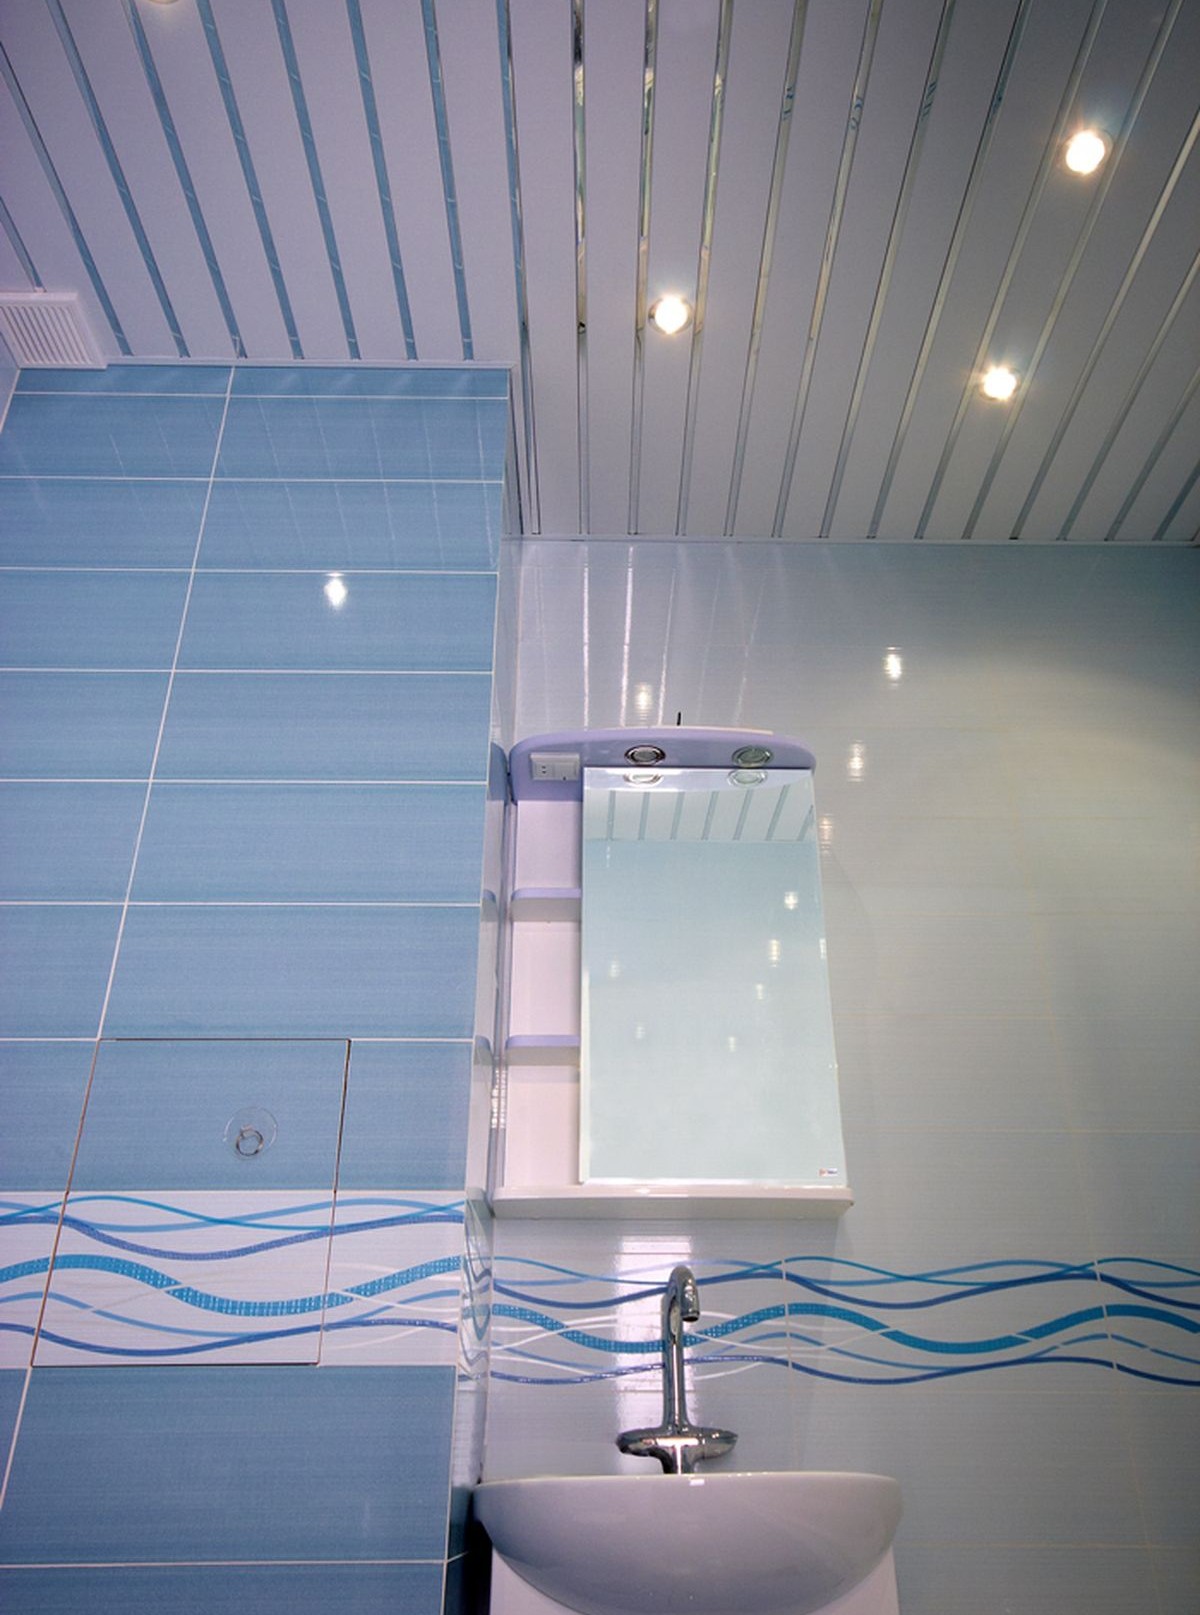
Finishing a bathroom ceiling is a challenge with many variables. High humidity, temperature fluctuations, and the need to conceal utility lines while maintaining an aesthetically pleasing appearance all require unique solutions. One of the most proven and practical options is a slatted ceiling. Many still view it as a relic of the past, associating it with offices or stores. But modern slatted ceiling systems are far from the drab panels we saw decades ago. I've installed hundreds of these ceilings and can confidently say: with the right approach, they offer the perfect balance of functionality, durability, and design for a wet room. Let's explore the possibilities this type of finish offers, how to choose correctly, and what you need to know about DIY installation.
A slatted ceiling is a suspended structure consisting of two key elements: a supporting frame (tracks or profiles) and decorative slatted panels attached to this frame. The slats are most often made of aluminum, a material that is completely inert to moisture and does not rust or warp. It is aluminum that makes this system so durable in a bathroom. This design allows for a perfectly flat surface, concealing any imperfections in the underlying ceiling, hiding wiring and ventilation ducts, and even incorporating spotlights. Gaps between the slats or special inserts provide natural ventilation above the ceiling, preventing moisture stagnation and mold growth.
Design features: open, closed and with inserts
One of the main advantages of slatted ceilings is their versatility. Depending on the method of joining the slats, there are three main types of construction, each offering its own visual effect and technical nuances.
Open system. The slats are attached to the frame with a small gap between them (usually 1-1.5 cm). The supporting track, which can be painted a contrasting color, is visible through this gap. This design has a high-tech, clean look, and emphasizes the geometry. It ensures maximum ventilation of the ceiling space. However, dust can get into the gaps, and poor installation can reveal unevenness in the frame. This type of ceiling requires more careful planning of the light fixture placement to ensure they do not interfere with the tracks.

Closed system. The slats are joined tightly together, creating a virtually monolithic surface with no visible gaps. This is achieved through a special slat profile with tongues and grooves. Visually, this type of ceiling is more similar to a stretch or painted ceiling, but retains all the advantages of aluminum. It better conceals the frame and has a more cohesive and austere appearance. However, ventilation in the space above the ceiling is poorer in this case, so it's important to provide forced-air ventilation in the bathroom.
System with decorative inserts. This is an intermediate and most interesting option from a design perspective. Special decorative strips made of plastic, aluminum of a different color, or even translucent material for hidden lighting are inserted between the slats. The inserts can be contrasting, creating a striped effect, or they can match the main slats, making the gaps less noticeable. This offers enormous scope for creativity, allowing you to zone the space or create accent areas.
Selection of slats: size, coating, color
The modern market offers slats ranging in width from 5 to 30 cm. Narrow slats (5-10 cm) visually lengthen the room when placed along a short wall, creating a sense of rhythm. Wide slats (15-30 cm) look more monumental and calm, creating a smoother ceiling. Standard slats are 3 or 4 meters long, allowing them to span most rooms seamlessly. If the room is longer, the joint is created using special connecting elements, but it's best to place them in an inconspicuous location.
The finish of the slats determines their appearance and durability. The most common options are:
- Polymer coating (polyester). Provides a matte or glossy surface. Gloss reflects light beautifully, but it shows any scratches and dust. A matte surface is more practical and has a refined appearance. A high-quality polymer coating is UV-resistant and does not fade over time.
- Anodizing. An electrochemical process that creates a durable oxide film on the aluminum surface. These strips often have a metallic sheen (gold, chrome, bronze) and are highly resistant to mechanical damage. Ideal for creating accents or in high-tech styles.
- Photo printing. Any design can be applied to the slats: from abstract designs to imitation wood, stone, or sky. This is the most striking, but also the most expensive option. The print quality must be high, and the coating must be moisture-resistant.

Color should be chosen based on the overall design. A classic rule for small bathrooms is light tones (white, cream, light gray) to visually expand the space. Mirrored or glossy slats also do an excellent job of reflecting light. In larger spaces, dark or rich colors can be used to create a dramatic effect. Remember that the ceiling is the fifth wall and should complement, not clash with, the wall and floor finishes.
Installation features: frame, levels and lighting
Installing a slatted ceiling is technically simpler than, say, a plasterboard ceiling, but it still has its secrets. The first and most important step is marking. Using a laser or water level, determine the plane of the future ceiling. The minimum clearance from the base ceiling is 5-7 cm if you only need to hide wiring, and 10-15 cm if you need to conceal a ventilation box or pipes. Keep in mind that every centimeter lowered reduces the room's height, which is critical for rooms less than 2.5 meters high.
Next, a starting (corner) profile is attached around the perimeter of the room. It defines the boundaries and supports the ends of the slats. It must be strictly level. Then, the supporting tracks (stringers) are installed. These are T- or H-shaped profiles to which the slats will be attached. The spacing between the tracks depends on the width of the slats and is typically 50-120 cm. The tracks are attached to the main ceiling with straight hangers, allowing for precise height adjustment. It's crucial to align all the tracks in a single plane—this determines whether the ceiling will be perfectly level or uneven.
Wiring for the light fittings should be completed before installing the track strips. All connections should be made in junction boxes, and the wiring itself should be secured to the main ceiling. Use moisture-resistant cables (such as VVGng-LS) and corrugated tubing for additional protection. For downlights, choose models with an IP44 rating or higher, designed for wet areas. LED bulbs are best—they generate little heat and are energy-efficient.
Installing the slats is the most enjoyable and quickest step. One end of the slat is inserted into the starting profile, lifted, and snapped onto the supporting rails along its entire length. The last slat usually needs to be trimmed to fit. This is done using a hacksaw or a grinder with a thin blade. After installation, the cut edges are covered with a butt profile or decorative corner.

Hidden possibilities and unconventional solutions
A slatted ceiling is more than just a flat surface. With proper design, it can solve complex problems. For example, it can easily be used to create a multi-level structure, highlighting the bathtub or vanity area. This is achieved by installing two independent frames at different heights. The transition between the levels is finished with a flexible profile or decorative molding.
Another interesting option is hidden lighting. This is achieved using a system with translucent plastic inserts. LED strips are installed behind the slats on the frame. Light passes through the inserts, creating a soft, even glow along the joints, creating an incredibly striking and modern look. This solution replaces the main lighting and creates a relaxing atmosphere.
If your bathroom has protruding pipes or a box that can't be removed, consider using it instead of hiding it. For example, install the ceiling so that this element is recessed and framed with slats of a different color. This will create an architectural accent rather than an annoying nuisance.

Practical tips for selection and care
To summarize, here are some practical recommendations. When purchasing, check the completeness: all profiles, rails, fasteners, and slats should be from the same batch to ensure consistent color. Don't hesitate to inspect the slats for scratches, dents, and even color. It's best to choose systems from reputable manufacturers (e.g., Albes, Clipso, Aristo)—they guarantee precise geometry and high-quality coating.
- For a standard bathroom For an area of 4-6 square meters, 10-15 cm wide matte white slats in a closed system are optimal. This will visually raise the ceiling without overloading the space.
- For a combined bathroom With a laundry area, consider installing a split-level ceiling to highlight the functional areas.
- Care The ceiling behind the slatted ceiling is simple. Once a month, simply wipe it with a soft cloth dampened with soapy water. Avoid using abrasives or hard brushes, especially on glossy surfaces. A weak vinegar solution is suitable for removing limescale.
- The main enemy The problem with this type of structure isn't moisture, but poor installation. An uneven frame, poorly secured tracks, or marking errors will cause the ceiling to wobble and creak. If you're unsure of your abilities, entrust the installation to professionals.
Thus, a modern slatted ceiling is a flexible, durable, and aesthetically pleasing design tool for bathrooms. It breaks away from the stereotype of a "budget office solution" and offers a wealth of design possibilities: from strict minimalism to complex multi-level compositions with backlighting. Its practical advantages—complete moisture resistance, easy maintenance, excellent ventilation, and access to hidden utilities—make it one of the smartest choices for wet areas. By taking the time to carefully select a system and ensure high-quality installation, you'll have a ceiling that will last for decades without complaint, remaining as fresh and neat as the day it was installed.