








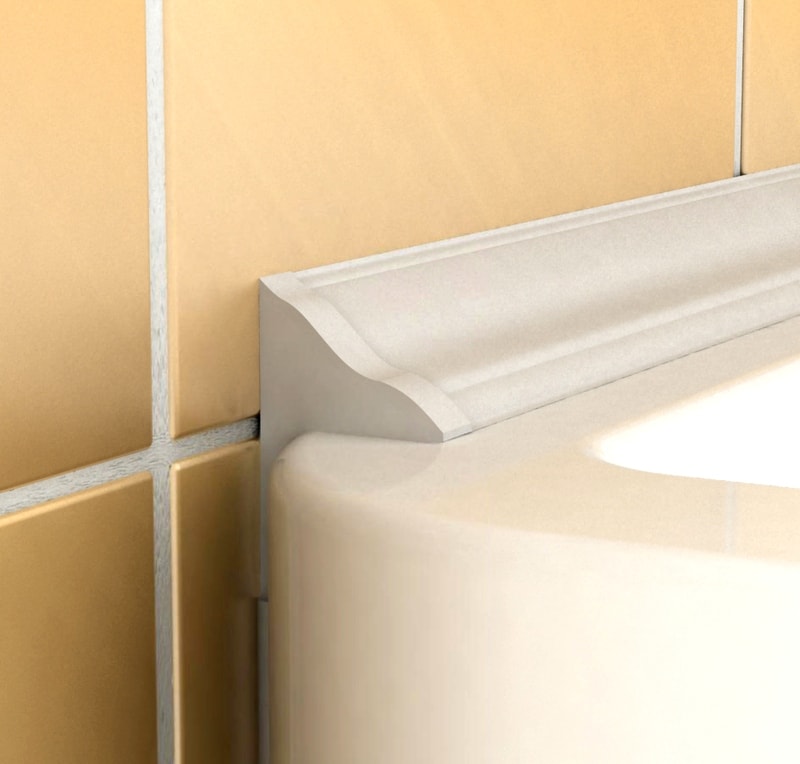
The joint between the bathtub and the wall is one of the most vulnerable spots in a bathroom. Even with perfect tiling, a small gap remains, allowing water to constantly seep in. Over time, this leads to dampness and deterioration of the wall, molding, unpleasant odors, and, in the worst case, leaks into the neighbors' homes. The solution to this problem is installing a special baseboard (border, molding). This is not just a decorative strip, but an important functional element that ensures a watertight seal. I've encountered various types of these baseboards and want to explain their features so you can choose the best option for your bathroom.
The main purpose of a skirting board is to create a tight, waterproof connection that compensates for minor imperfections in the bathtub edge and wall, and conceals the silicone sealant, protecting it from mechanical damage and fading. A secondary, but equally important, purpose is aesthetics. A properly selected skirting board completes the look, conceals minor imperfections, and can be a stylish accent. But which material should you choose: practical plastic, durable ceramic, or a temporary self-adhesive option? Let's delve into the details.
Ceramic skirting board (border): for major repairs
This is the most durable and long-lasting option. It's the same tile, but in the form of a narrow strip (a molding) or a special corner piece. It's installed simultaneously with the wall covering, using the same tile adhesive. This baseboard becomes one with the wall, creating a monolithic and completely waterproof surface. It's resistant to all cleaning agents, doesn't fade, and lasts for decades. It's ideal for major renovations that involve completely re-tiling.
However, ceramic borders also have their drawbacks. First, they're difficult to install. They require tiling skills, precise 45-degree cuts for corner joints (or the use of ready-made corner pieces). Second, they're rigid and can't compensate for significant unevenness in the bathtub or wall. If the gap between them is more than 1-1.5 cm, it will have to be filled with mortar first. Third, if the bathtub "moves" under a person's weight (a common occurrence with steel and acrylic models), the rigid ceramic joint can crack. Therefore, they're more often used with heavy cast iron bathtubs, which are designed to be immobile.
- Pros: Absolute moisture resistance, durability, strength, perfect appearance when combined with tiles.
- Cons: Complex installation requiring skill; rigidity; cannot be installed over existing finishes without removing tiles; high cost of materials and labor.
- Installation: It is installed using tile adhesive at the same time as the wall tiles. The joints are grouted with the same grout. It requires a perfectly flush fit between the bathtub and the wall.
- For whom: For those who are doing a major renovation with replacement of all finishes, have a cast iron bathtub and smooth walls.
Plastic and acrylic skirting boards: the golden mean
This is the most popular and versatile option. A plastic border is a flexible or rigid U-shaped strip that attaches to the wall at one end and covers the end of the bathtub at the other. It comes in a variety of colors (most commonly white) and can imitate chrome, marble, or wood. Its main advantage is flexibility. It can bend to follow the shape of the bathtub and compensate for gaps of up to 2-3 cm. It is installed quickly and easily with liquid nails or silicone sealant, and can be done at any stage, even after all finishing work is complete.
Acrylic baseboards are a higher-quality and more expensive variety of plastic. They are thicker, more durable, less prone to yellowing, and have a more elegant appearance, often with a glossy finish. Both plastic and acrylic baseboards come with internal and external corners, as well as end caps, allowing for neatly contouring any curve. After gluing, the joint between the baseboard and the wall, as well as between the baseboard and the bathtub, is sealed with silicone sealant in the same color as the baseboard to ensure a complete seal.
- Pros: Simple and quick installation, flexibility, ability to hide unevenness, low price (plastic), wide choice of colors.
- Cons: Plastic can turn yellow over time (especially cheap ones), is less durable than ceramics, and can peel off if installed poorly.
- Installation: A bead of silicone or liquid nails is applied to a clean, degreased surface. The baseboard is pressed into place and secured with masking tape until the adhesive dries. The seams are then sealed.
- For whom: Suitable for most situations. Ideal for quick cosmetic repairs and installation on acrylic and steel bathtubs with slight movement.

Self-adhesive (tape) skirting: a temporary solution
This is the simplest and cheapest option. It consists of a flexible strip of foamed polyethylene or rubber with an adhesive layer protected by a paper backing. It often has a decorative coating that imitates chrome, marble, or is simply painted white. Installation is simple: measure the required length, tear off the backing, and adhere the strip to the joint, pressing it along its entire length. Corners are finished with a simple overlap or trim.
This type of baseboard is good as a temporary measure: when you need to quickly and cleanly cover a gap, but a major renovation is planned for the future. It's also suitable for a rented apartment. Its main drawbacks are its short lifespan (the adhesive dries over time, causing the tape to peel off at the edges), its low strength (it's easy to snag and tear), and its porous structure, which can absorb dirt and become a breeding ground for germs. It doesn't create the same reliable moisture barrier as rigid options, so it's still recommended to apply a layer of silicone underneath.
- Pros: Low cost, instant installation without tools or mess, flexibility.
- Cons: Very short-lived (1-3 years), looks cheap, can peel off, absorbs moisture and dirt.
- Installation: Degrease the surface, cut the tape, remove the protective film and stick, smoothing from the center to the edges.
- For whom: For temporary repairs, for rented housing, for summer cottages or when the budget is extremely limited.
Step-by-step instructions for installing plastic skirting boards
Let's look at the most common installation option: installing flexible plastic baseboards with silicone. You'll need: the baseboard itself with corners, silicone sealant (water-resistant, with antifungal additives, preferably matching the color of the bathtub or baseboard), a nail gun, a sharp knife or hacksaw, alcohol or acetone for degreasing, masking tape, and a rubber spatula.
1. Preparation. Thoroughly wash and dry the joint between the bathtub and the wall. Degrease the surfaces with alcohol. If old grout or sealant is peeling, remove it completely. 2. Fitting and cutting. Place the baseboard against the corner. Mark the cut location for the corner piece or for the 45° angle joint. Cut carefully with a hacksaw. Lay out the entire baseboard around the perimeter to check. 3. Applying sealant. Apply a thick, continuous bead of silicone caulk to the back of the baseboard (in the groove that will meet the wall and tub). Be generous with the caulk, but don't let it bulge out the entire length after pressing.
4. Gluing. Place the baseboard in place and press firmly along its entire length. Secure it to the wall and the bathtub rim with masking tape, applying even pressure. Immediately remove any excess sealant that appears at the top and bottom with a rubber spatula or your finger dipped in soapy water. 5. Final sealing. After the adhesive under the baseboard has dried (after 24 hours), remove the tape. Now you need to fill the remaining thin joints with silicone: between the baseboard and the wall and between the baseboard and the bathtub. Carefully apply a thin, neat bead and smooth it with a spatula or wet finger. Allow the silicone to dry completely (another 24 hours) before using the bathtub.
- Don't skimp on silicone. Cheap acidic silicones can have a strong odor and poor adhesion to some surfaces. Neutral silicones are better.
- Work in a well-ventilated area.
- Try to make corner joints using ready-made corners - this is both simpler and more airtight.
- If the length of the bathtub is longer than the length of the baseboard, join the two pieces not in the corner, but on a flat area, coating the ends with silicone.
- Don't rush to use the bathtub. It takes at least 24-48 hours for the silicone to fully cure.

Choosing a bathroom baseboard isn't a matter of design, but rather a matter of functionality and durability. If you're renovating to last for decades, choose a ceramic baseboard. For a standard renovation with a good price-quality ratio, a plastic or acrylic baseboard, carefully sealed with silicone, is optimal. Self-adhesive tape is a purely temporary solution. Whatever option you choose, remember that the key to success is surface preparation and a high-quality sealing joint. It is the joint, not the baseboard itself, that is the main barrier to water.