






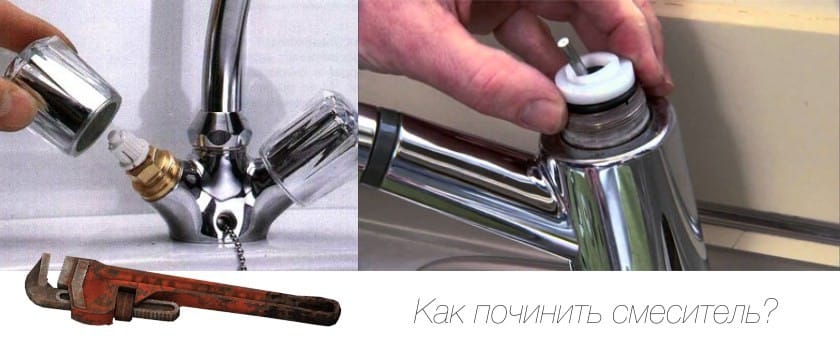
A leaky, squeaking, or completely temperature-uncontrollable faucet isn't just a source of irritation; it's a sign of accumulated dirt, a worn-out gasket, or a faulty cartridge. Many people immediately reach for the phone to call a plumber, and rightly so if you're unsure of your abilities. But trust me, in most cases, faucet repair is a simple mechanical operation, accessible to anyone with a wrench and screwdriver. The key is to understand the specific type of faucet you're dealing with and proceed consistently, avoiding excessive force to avoid damaging the delicate decorative elements.

All household faucets are divided into two broad families: two-handle (with wing nuts) and single-lever (with a single handle). Single-lever faucets, in turn, come in two fundamentally different designs: ball faucets and those with a ceramic cartridge. The type can often be determined even visually. Ball faucets typically have a more rounded body under the lever, and the lever itself is secured with a single large screw. Cartridge faucets are often thinner, and the lever mount may be hidden under a decorative cap. The disassembly procedure and the required spare parts will depend on the type of design.
Tools and diagnostics: where to start
Before digging under your sink or bathtub, do a simple diagnostic. Where exactly is the water leaking? From the base of the spout? From the handles? Or is water leaking from the spout itself, even when the faucet is closed? In the first two cases, the problem is most likely worn gaskets or packing. In the latter case, the cartridge or ball mechanism is at fault, not shutting off the water completely. Another common problem is weak water pressure due to a clogged aerator (the mesh at the end of the spout).
Get your tools ready. You'll almost certainly need: an adjustable wrench (gas-powered) or a set of open-end wrenches, flat-head and Phillips-head screwdrivers, Allen keys (often 3-4 mm), and needle-nose pliers. To protect chrome parts from scratches, stock up on rags or electrical tape—you can wrap it around the jaws of the wrench. WD-40 or similar will also come in handy if the threads are stuck. And, of course, a container to drain any remaining water and rags. The very first step, which should never be skipped, is to shut off the water at the riser or the lines to the faucet! After shutting off the water, open the faucet to relieve any residual pressure in the system.
- For two-valve taps: Most often, you need valve gaskets (crane boxes), rubber or silicone seals, fum tape or thread for winding.
- For single lever with cartridge: You'll need a new cartridge. Important! They come in different diameters (usually 35 mm and 40 mm) and different pin shapes. The best way to be sure is to disassemble the faucet, remove the old cartridge, and take it with you to the store as a sample.
- For ball mixers: Repair kits may be required, including new O-rings (seats) and the ball itself. It's often easier and more reliable to replace the entire ball mechanism cartridge.
Disassembling a two-valve faucet: a classic
The design of these faucets has been proven for decades. The water flow is shut off by turning the flywheel, which presses a rubber (or ceramic) seal on the end of the valve body against the "seat"—the opening through which water enters. Over time, the seal wears away, and water continues to leak. Sometimes, the valve body threads or the packing under the flywheel wear out, causing water to leak from under the handle itself. Disassembly begins with removing the decorative caps on the flywheels. Underneath them is a screw that secures the flywheel to the valve body stem. Unscrew it with a screwdriver and remove the handle.
Next, use a wrench (usually a 17 or 19 mm) to unscrew the valve stem itself. If it doesn't budge, apply a drop of WD-40 to the threads and wait 10 minutes. Inspect the unscrewed part. If the gasket is worn, carefully cut off the old one and install a new one. It's important that the new gasket fits precisely in the groove. If the problem is in the seal (leaking under the handle), add more packing or replace the rubber O-ring on the stem. Before reassembling, be sure to wrap 5-6 turns of PTFE tape around the valve stem threads to ensure a tight seal. Reassemble in reverse order, tightening with a wrench, but without excessive force to avoid stripping the threads in the body.


Inside a single-lever mixer: ball mechanism
Ball faucets were very popular in the 1990s and early 2000s. Their operating principle is elegant: inside is a hollow ball with three openings—two inlets (for hot and cold water) and one outlet. By turning the lever, you align the cavities in the ball with corresponding chambers in the body, regulating both temperature and water flow. The main problems with these faucets are wear of the rubber seals that hold the ball in place and the accumulation of limescale deposits on the ball itself, preventing it from sealing properly.
Disassembly. First, remove the decorative cap with the inscription "C" (cold) and "H" (hot), or simply the colored one. Underneath is a locking screw securing the lever. It's often a hexagon. Unscrew it and carefully lift the lever off, rocking it. It may be tight due to scale buildup. Underneath the lever, you'll see a plastic dome-shaped cover (cap), which can be unscrewed by hand or with a wrench. Once removed, you'll see the ball itself. Carefully remove it, noting its position. Underneath the ball are two springs and two rubber seats. These are the ones that often require replacement. Rinse the entire interior under running water to remove all scale and sand. The ball can be wiped with vinegar to dissolve limescale. Reassemble in reverse order, installing new seats and springs from the repair kit.


Single-lever mixer with ceramic cartridge
This is the most common type today. It's more reliable than a ball valve, and repairs often involve simply replacing the cartridge. Inside is a ceramic cartridge—a cylinder with two tightly fitted ceramic plates. The lower plate contains three holes, and the upper plate contains a chamber. When the lever is moved, the holes align in varying proportions, mixing the water. If the ceramic is cracked or sand gets between the plates and they wear away, the cartridge will leak or become difficult to adjust.
Disassembly is similar to that of a ball valve, but simpler. Remove the lever (also through the locking screw under the decorative cap). Under the lever, you'll find a large decorative nut (often chrome-plated). Unscrew it with an adjustable wrench, first wrapping it in a rag. Underneath is a clamping bracket and the cartridge itself. The cartridge isn't secured with screws; it's simply inserted into the grooves. It can be removed by gently prying it with a screwdriver. Inspect the seat and remove any debris. Install the new cartridge, carefully aligning the tabs on its bottom with the grooves in the faucet body. Then, reassemble everything. Important: the hot/cold position of the lever depends on the orientation of the cartridge. The manufacturer typically marks the hot water side.


Common spout failures and prevention
Problems aren't limited to the mixing mechanism. The spout itself often wears out. Under its base is a swivel joint, sealed with one or two O-rings. Over time, the rubber hardens, causing water to leak from under the spout base when it's turned. To repair this, turn off the water supply and unscrew the nut securing the spout (located under the sink or bathtub). Remove the spout, replace the O-rings with new ones, lubricate them with silicone grease, and reassemble.
Another common problem is a clogged aerator. This is the small mesh at the end of the spout that aerates the water flow, making it soft and conserving water. Small debris and limescale deposits can cause weak and uneven water flow. The aerator can usually be removed by hand or with pliers (using a rag). It can be cleaned with a needle, an old toothbrush, or by soaking it in descaling solution. If that doesn't help, buy a new one; they're standard.
- Prevention of limescale: Install a coarse filter at the water inlet to your apartment. This will protect not only your faucets but also your appliances.
- Smooth movements: Avoid pulling the levers of single-lever faucets sharply or forcefully. This leads to premature wear of the ceramic and seals.
- Water quality: If you have very hard water, your faucets will break more often. Consider installing a softener.
- Purchase of spare parts: Always take the old part with you to the store. It's very easy to misjudge the diameter, height, and configuration of the cartridge pins or gaskets by eye.

Ultimately, disassembling and repairing a faucet isn't rocket science, but a logical process built on an understanding of simple mechanical principles. Don't be afraid to look inside. Even if you discover the problem is more complex (for example, a cracked housing), you won't lose anything and will gain invaluable experience. And remember: precision and consistency are your best allies. Don't use excessive force, use the right tools, and your repaired faucet will last for many years to come.