








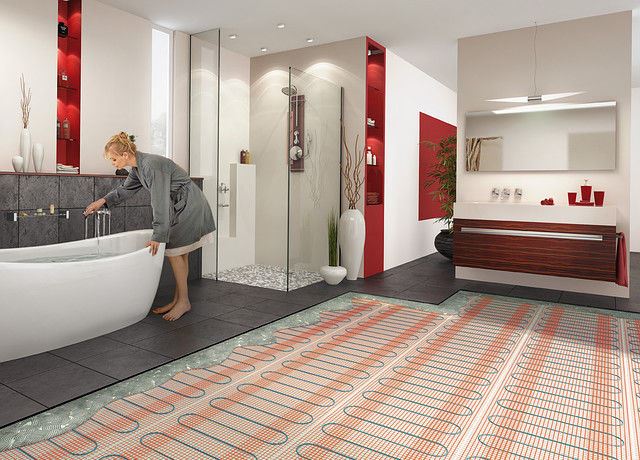
The operating principle and advantages of hydronic underfloor heating in the bathroom
The idea of heating a room through the floor rather than through radiators has been around since ancient times, but modern technology has made it accessible, efficient, and safe. Hydronic underfloor heating is a system of pipes laid in the screed through which a coolant (usually water from a heating system or a separate boiler) circulates. Heat from the pipes is transferred to the screed, which in turn evenly heats the flooring, which in turn heats the air in the room. This heating method is especially useful in the bathroom. Firstly, it solves the problem of cold tiles, which are unpleasant to walk on with bare feet after a shower. Secondly, it ensures quick and even drying of the floor after showering, preventing dampness and mold. Thirdly, it creates a comfortable microclimate, as warm air rises from below, warming the entire body.

Compared to electric systems (cable or mats), hydronic underfloor heating offers several key advantages. The most important is its cost-effective operation. When connected to a gas boiler, heating costs are several times lower than with electricity. The system does not generate electromagnetic fields, which is important for health. It is durable—high-quality polymer pipes last 50 years or more. The heat from hydronic underfloor heating is perceived as softer and more natural. However, there are significant limitations. In apartment buildings with central heating, independent connection to the risers is prohibited, as this disrupts the hydraulic balance of the entire building system and can lead to cooling of neighbors' radiators. Legalizing such a connection is virtually impossible. Therefore, hydronic underfloor heating is reserved for private homes, cottages, or apartments with individual heating boilers. The system also requires professional calculations and competent installation, as errors can lead to leaks, which in a bathroom can be catastrophic.
Design and calculation of the system: the basis for future comfort
Before purchasing materials, it's essential to create a plan. This isn't a formality, but a necessity that will save money, time, and stress. Start with a precise, scaled bathroom plan. Mark permanent fixtures that won't be moved: the bathtub or shower stall, toilet, sink, and washing machine. Avoid laying pipes under these fixtures—it's a waste of materials and will overheat the equipment. The primary area for laying pipes is the exposed floor. Next, calculate the room's heat loss to determine the required system capacity. For a standard bathroom in a brick or panel house with good glazing and insulated walls, the estimated capacity is 120-140 W/m². If the room is in a corner or has a large window, the figure may be higher.
The heat loss determines the pipe spacing and circuit length. The higher the required power, the smaller the spacing (distance between pipes). Standard spacing is 15, 20, or 25 cm. For bathrooms, where it's important to quickly warm the floor, a spacing of 15 cm is often chosen. An important rule: the length of one circuit (one loop of pipe) should not exceed 100 meters for a 16 mm pipe and 120 meters for a 20 mm pipe. Otherwise, the flow resistance will be too high, and the circulation pump will not cope. For an average bathroom of 4-6 m², one circuit is usually sufficient. If the area is larger or the shape is complex, it is better to split the circuit into two independent circuits of approximately equal length.
The next step is choosing a pipe layout. There are two main ones: the "snail" (spiral) and the "serpentine." The "snail" is easier to calculate and install, but results in uneven heating: the beginning of the circuit (the supply) will be hot, while the end (the return) will be colder. The "snail" ensures uniform temperature distribution across the entire area, since the supply and return pipes run parallel. For a bathroom, where the installation area is small, a "snail" layout is also suitable, especially a double or combined one. On the plan, draw the pipe layout path, observing the selected pitch. Keep in mind that the pipe should not have any sharp bends—the minimum bend radius for a 16 mm metal-plastic pipe is five times its diameter (8 cm). Calculate the total pipe length, adding in allowance for the rise to the manifold and possible errors. It is best to entrust all these calculations to a heating engineer or use specialized software available from major suppliers of underfloor heating equipment.

Selecting materials and components: what you shouldn't skimp on
The quality of an underfloor heating system directly depends on the quality of its components. Skimping on small details can lead to major problems. Let's break down what's required for installation.
Pipes. This is the main element. Pipes made of cross-linked polyethylene (PEX), metal-plastic, or heat-resistant polyethylene (PE-RT) are used for underfloor heating. All of these are flexible, durable, and have low hydraulic resistance. The optimal diameter is 16 mm (outer) or 20 mm for larger areas. The pipe must be supplied in coils as a single piece, without joints in the screed. Joints in the floor are not allowed! Be sure to check the markings: the pipe must be specifically designed for heating and withstand temperatures up to 95°C and a pressure of 6-10 bar.
Collector and mixing unit. «The "brain" of the system. The manifold distributes the coolant flow among the circuits, and the mixing unit prepares the water at the required temperature. Underfloor heating requires a temperature of 35-45°C, while the boiler produces 60-80°C. The mixing unit, using a thermostatic head and a circulation pump, mixes the cooled return water with the hot water, achieving the set temperature. The manifold must have flow meters (rotameters) on each branch to balance the circuits and servo drives for automatic temperature control in each room (if there are multiple circuits).
Thermal insulation. Its purpose is to direct heat upward into the room, rather than heating the floor slab or ground. For floors on the ground or above an unheated basement, extruded polystyrene foam (EPS) 50-100 mm thick is used. For interfloor ceilings, 5-10 mm thick foil-clad polyethylene foam or special profile mats for underfloor heating with studs are sufficient. These mats (made of EPS or expanded polystyrene) have protrusions between them, making it very easy and quick to lay the pipe, securing it without additional clips.
Fasteners and auxiliary materials. To secure the pipe to the insulation, you'll need plastic clamps, harpoon clips, or, as mentioned above, profile mats. For screed reinforcement, use a metal mesh with a 100x100 mm or 150x150 mm mesh size made of 3-4 mm wire. Damper tape compensates for the thermal expansion of the screed around the room's perimeter. A waterproofing film (if the floor is installed on the ground or there's a risk of leaks from above) is also needed. You'll also need the following tools: a pipe cutter, crimping pliers for fittings (if using metal-plastic), a staple gun, and adjustable wrenches.

Step-by-step installation of the system yourself
Editing is a demanding process that requires consistency and precision. It's best to split the work over several days.
Day 1: Preparing the base and laying thermal insulation. The base (floor slab) must be clean and level. Any differences in level of more than 1 cm per meter must be leveled with a thin screed or self-leveling floor. A damper tape is attached around the perimeter of the room to the height of the future screed. Then, the insulation is laid. The EPS sheets are laid staggered, and the joints are sealed with tape. If standard insulation is used, a foil film is rolled out on top, shiny side up. If mats with studs are used, this step is skipped.
Day 2: Laying and fixing pipes. According to the plan, we begin laying out the pipe from the manifold. The pipe should be unwound gradually from the coil, avoiding kinks. We secure it to the mesh or mats with clips or insert it between the studs. It's important not to pinch the pipe with the fasteners. When laying the pipe in a "snake" pattern, make a smooth turn, maintaining a minimum radius. The ends of the pipe that will connect to the manifold are temporarily plugged to prevent debris from getting inside. After the entire circuit is laid, the ends of the pipes are brought to the location where the manifold cabinet will be installed.

Day 3: Reinforcement and pressure testing. We roll out a reinforcing mesh over the laid pipes. This will strengthen the screed and help distribute heat evenly. Now the most important step is pressure testing (hydraulic testing). We connect the circuit to the manifold and fill the system with water (or compressed air using a compressor). We create a pressure 1.5-2 times higher than the operating pressure (approximately 4-6 bar) and leave the system under pressure for at least 24 hours. During this time, the pressure should not drop. This is a leak test. If everything is in order, we can begin pouring the screed. If the pressure drops, we find and fix the leak.
Day 4: Pouring the screed. Pipes under pressure! This is a must. For the screed, use special mixtures for underfloor heating or a cement-sand mortar of at least grade M300 with a plasticizer. The minimum screed thickness above the pipe is 3-5 cm. Pour the mixture and level it using a leveling float. It's important to ensure there are no voids in the screed around the pipes. After pouring, cover the screed with plastic wrap and allow it to harden for 28 days. Spray the surface with water for the first week to prevent shrinkage. Turning on the heating until it's completely dry is strictly prohibited!

System startup and operating details
After 28 days, when the screed has completely dried and gained strength, you can begin the first run. This is done gradually to avoid causing thermal stress in the screed. Turn the boiler on to the minimum temperature (25-30°C) and let the system run for 24 hours. Then, increase the temperature by 5°C each day until the design temperature is reached (usually 35-40°C on the floor surface). This process takes about a week. After this, you can lay the final flooring. For a bathroom, ceramic tiles or porcelain tiles are the best choice. They have high thermal conductivity, meaning they transfer heat effectively. Thick wood flooring, cork, or carpeting are not recommended, as they will act as thermal insulators.
After tiling and grouting, the system is ready for continuous operation. To maintain comfort, there's no need to heat the floor to high temperatures. A surface temperature of 26-28°C is sufficient. Control is via a thermostat, which, depending on the model, can monitor either the room air temperature or the floor temperature (the sensor is embedded in the screed during installation). The thermostat signals the servomotors on the manifold, which open or close the coolant flow into the circuit. Modern systems can be integrated into a smart home and controlled remotely.
System maintenance is minimal. Once a year before the heating season, it is recommended to flush the circuits and check the operation of the manifold and pump. If the system uses regular water, sediment may form over time. To prevent this, it is best to use distilled water or a special antifreeze coolant (if there is a risk of freezing). It is important to remember that any drilling or chasing of the floor after installation is strictly prohibited. All utilities must be installed in advance. If an accident occurs (for example, a pipe is punctured during furniture installation), the leak can be localized using a thermal imager, and repairs will involve cutting the screed at the problematic area and installing a repair sleeve (for metal-plastic) or a compression sleeve (for PEX).
Hydronic underfloor heating in the bathroom is an investment in comfort, health, and the longevity of your renovation. With proper design, high-quality materials, and careful installation, it will delight you for decades with a pleasant warmth underfoot and a healthy microclimate in the most humid room of the house.