






Regular cleaning of your shower stall isn't just about maintaining its shine; it's a crucial hygiene procedure that affects the longevity of your equipment and the health of your family. Hard water, containing calcium and magnesium salts, leaves unpleasant, whitish residue that eventually hardens into limescale. Soap deposits, skin particles, and hair create a breeding ground for bacteria and fungus. In this article, I'll share my years of experience in keeping your shower stall in tip-top condition using both store-bought products and simple household remedies found in any kitchen.
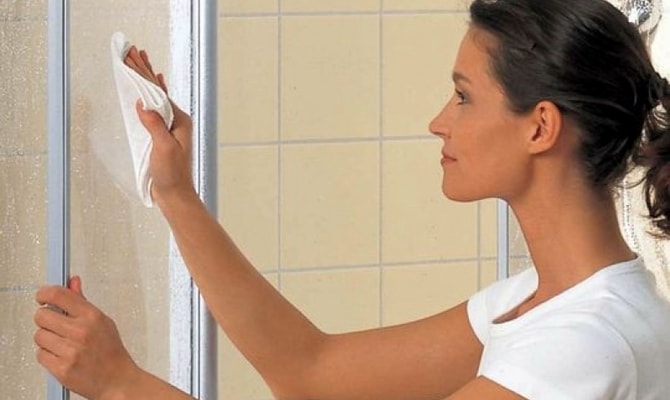
Many people make the mistake of starting their cleaning routine with harsh chemicals without understanding the surface material. Glass, acrylic, enameled steel, and plastic require completely different approaches. For example, abrasive powders will instantly scratch acrylic, while acidic cleaners can damage the grout between tiles. Before grabbing a sponge, take stock: determine the material of the walls, shower tray, faucet, and hardware. Remember this simple rule: acidic cleaners are suitable for glass and chrome parts, while only mild alkaline or neutral cleaners are suitable for acrylic and plastic.
A systematic approach to shower cabin maintenance
Fighting stubborn deposits is useless without regular maintenance. I always recommend a three-step system to my clients that prevents problems. The first step is a daily five-minute habit. After each shower, simply rinse the walls and shower tray with cool water from the shower head and go over them with a squeegee. This simple step removes most of the soap solution and water droplets, preventing them from drying and leaving marks. If you have a minute, wipe the surfaces with a dry microfiber cloth—this is guaranteed to prevent streaks.
- Daily care Don't neglect to simply rinse and wipe surfaces after use. A rubber squeegee and microfiber cloth will be your best helpers in the fight against soap scum and limescale at an early stage.
- Weekly deep cleaning – Once a week, spend 15-20 minutes cleaning the cabin. Apply a specialized product (such as a daily care spray or a gentle cream cleaner), let it sit according to the instructions, and then rinse thoroughly with plenty of water. Pay special attention to joints, corners, and the drain.
- Intensive cleaning If preventative measures haven't been taken for a long time, more serious measures will be required. Stronger cleaners containing acids or alkalis will remove stubborn deposits, but they require caution and good ventilation.
In my practice, I often encounter situations where people have been unable to remove frosted stains from their glass doors for years. This is usually the result of improper care—using harsh, alkaline glass cleaners. These destroy the protective coating, causing the surface to become porous, quickly attracting dirt. Citric or acetic acid-based cleaners are ideal for glass, as they dissolve mineral deposits without damaging the structure of the material.
Preparing for cleaning: what you need to know
Before declaring war on stains, conduct a thorough investigation. Inspect your shower stall like a professional. Run your hand over the surfaces: if you feel roughness, it's the beginnings of limescale. If the surface is slippery, it's a bacterial film. Dark spots in corners and joints are likely mold. Each type of stain requires its own tactics. Don't use a single, universal solution on all fronts—it's ineffective and can damage the materials.
- Glass and plastic elements (doors, walls) are sensitive to abrasives, but tolerate acidic compounds well.
- Acrylic, ceramic or stone trays require gentle cleaning agents without abrasive particles.
- Chrome-plated steel (attachments, handles, hinges) is sensitive to chlorine-containing agents, which cause corrosion.
- Aluminum frames can darken from aggressive alkalis, so it is better to use neutral compounds for them.

I was once approached by the owners of an expensive shower stall with matte, opaque streaks on the glass that defied any cleaning. It turned out that the previous "cleaners" had used steel wool for soaping, leaving millions of micro-scratches on the surface. A complex glass polishing procedure with special pastes was necessary. Remember: never use abrasive tools on transparent surfaces. Even a soft scraper should be made of plastic or rubber, and the sponge should not have a hard coating.
Tools for safe cleaning
Choosing the right tool is half the battle in the fight for cleanliness. I've amassed a whole arsenal of tools that I use daily. The most versatile of these is a double-sided squeegee. I use the rubber side to remove excess water from the glass after a shower, and the sponge side to apply cleaning products. Microfiber cloths absorb moisture well and don't leave streaks, unlike regular cloths. For hard-to-reach areas around the faucet and in corners, I use soft toothbrushes—they're perfect for cleaning dirt from small crevices.
- Squeegees made of polyurethane or rubber effectively remove water without the risk of scratching the surface.
- Microfiber cloths and rags absorb 8 times more moisture than cotton counterparts and are lint-free.
- Soft synthetic sponges are suitable for applying cleaning products to all types of surfaces.
- The steam cleaner was a real discovery for me – it copes well with grease and soap deposits without the use of chemicals, which is especially important for families with allergies.
I'd like to talk about choosing sponges separately. The hard side of a regular kitchen sponge is absolutely unsuitable for shower enclosures—it leaves micro-scratches that, over time, dull the surface. I use only special soft sponges without an abrasive coating. Suede cloths are ideal for glass—they give the surface a perfect, streak-free shine. Chrome parts are best cleaned with a very soft cloth, such as one made from an old flannel shirt—it polishes the metal to a mirror shine.
Professional shower cabin cleaning products
The modern chemical industry offers a huge selection of specialized shower cabin cleaning products. I've tried dozens of formulas and identified several categories that truly work. Anti-limescale sprays are ideal for daily maintenance—they can be applied to damp surfaces after a shower and left on. They create an invisible film that prevents water droplets from sticking and limescale buildup. These products are typically neutral in color. pH and are safe for all surfaces.
Sprays for daily care These are preventative products that require no rinsing and effectively prevent plaque buildup. Apply after each shower to still-wet surfaces.
For weekly cleaning, I recommend cream or gel cleaners. Unlike liquid sprays, they stay on vertical surfaces longer, dissolving stains. I apply them to a damp sponge, spread them over the surface, leave them for 5-10 minutes (according to the instructions), and then rinse thoroughly with a strong stream of water. Products labeled "anti-calc" are especially effective—they contain weak acids that break down the crystalline structure of limescale.
Hazardous ingredients to avoid
Not all products available in stores are safe for your shower or your health. I always carefully read the ingredients before purchasing. Combining different chemicals—for example, chlorine-containing products with acidic ones—is especially dangerous. Such a mixture can release toxic gases. I once witnessed a housewife mixing toilet bowl cleaner with vinegar while trying to remove mold. The result was disastrous: severe poisoning and damaged surfaces.
- Formic acid in high concentrations can damage acrylic surfaces and the grout between tiles.
- Aggressive solvents (acetone, toluene) destroy plastic parts and seals.
- Formaldehyde and other preservatives can cause allergic reactions and respiratory irritation.
I also don't recommend using universal products for the entire bathroom—they often contain compromise formulas that are ineffective against the specific stains found in shower stalls. Toilet bowl cleaner won't remove limescale from glass, and mirror cleaner is useless against soapstone. It's better to have two or three specialized products than one universal one that doesn't fully address any one problem.
Cleaning a shower head from limescale
A limescale-clogged shower head is one of the most common problems in hard water regions. The small holes gradually become clogged with mineral deposits, weakening the water pressure and making the stream uneven. I've developed a simple and effective cleaning method that restores your shower head to its original performance. No expensive cleaning products are required – just regular table vinegar with a concentration of 6-9%. Avoid using vinegar essence – it's too harsh and can damage the rubber seals.
- Remove the watering can and place it in a container of vinegar for 2-3 hours. If the stain is particularly severe, you can warm the vinegar slightly—heat speeds up the chemical reaction.
- For non-removable models, use a bag of vinegar secured with a rubber band around the shower head. Make sure all openings are submerged in the liquid.
- After treatment, clean the holes with a soft toothbrush - this will remove softened deposits.
- Rinse thoroughly with water for 3-5 minutes to remove any remaining vinegar and dissolved limescale.
Sometimes, after cleaning plastic watering cans with vinegar, a distinctive odor remains. To remove it, I rinse the can with water and a small amount of baking soda—it neutralizes the acid and eliminates the odor. For metal watering cans, especially those with a chrome finish, you can replace vinegar with citric acid—it's less aggressive toward metal. A solution of 50 grams of citric acid per liter of warm water works just as well.
Eco-friendly alternatives to chemicals
In recent years, more and more people have been thinking about eco-friendly cleaning products. I support this trend and actively use safe, home-made methods in my work that are just as effective as industrial chemicals. The most versatile cleaner is regular baking soda. Mixed with a small amount of water to form a paste, it effectively removes soap scum and grease from acrylic surfaces. I apply it with a soft sponge, lightly rub the problem areas, and leave it for 10-15 minutes, then rinse with warm water.

- Homemade product for glass surfacesMix 1 part vodka with 2 parts water. Apply to the surface, then wipe dry. The alcohol dissolves grease films and gives the glass a perfect shine.
- Toothpaste for metal partsApply a thin layer to the stain, then rinse with water after 15 minutes. The abrasive particles in the paste gently polish the surface without scratching.
- Vinegar against rustSpray onto the surface, leave for 30 minutes, then rinse. The acid dissolves iron oxides, restoring the metal to its original appearance.
To combat mold in joints and corners, I use hydrogen peroxide. It's a safe alternative to chlorine bleach. I apply a 3% hydrogen peroxide solution to the affected areas with an old toothbrush, leave it for 30-40 minutes, and then rinse thoroughly. For a more effective solution, you can add a few drops of tea tree essential oil—it has natural antibacterial properties. This mixture not only kills existing mold but also prevents it from returning.
Citric acid is a universal remedy
Citric acid is my go-to solution for limescale removal. It's gentler than vinegar, has no strong odor, and is safe for most surfaces. I use it to clean glass doors, faucets, and even drains. The acid breaks down the crystalline structure of calcium carbonate, the main component of limescale, turning it into easily washable salts. A weak solution is sufficient for regular cleaning; a more concentrated solution is needed for stubborn deposits.
- Mix 20 g of baking soda, 30 g of citric acid, and a glass of warm water. Spray onto surfaces and rinse after 10 minutes. This combination effectively dissolves and mechanically removes stubborn stains.
- Apply a concentrated solution of citric acid and water to the stain using a sponge. For stubborn stains, you can use a paste made from the acid and a small amount of water.
- As a preventative measure, add a teaspoon of citric acid to the rinse aid container of your dishwasher – this will soften the water and reduce scale buildup.
I once had to clean a shower stall that hadn't been cleaned in years. Limescale had formed a real crust on the glass and faucet. I made a thick paste of citric acid and water, applied it in a thick layer to the problem areas, wrapped it in plastic wrap (to prevent it from drying), and left it overnight. In the morning, all that was left was to rinse off the softened paste—the surfaces looked like new. This method is especially effective on vertical surfaces, where liquid cleaners run off quickly.
Professional care tips
Over the years, I've developed my own tricks that make shower maintenance significantly easier. The most important of these is to never put off cleaning. Fresh stains are ten times easier to remove than old ones. If you notice the first signs of limescale, treat the problem area immediately with a special cleaner. Don't wait until the thin film turns into a hard crust, which will require hours of work and harsh chemicals to remove.
- Use a double-sided squeegee: the rubber side to remove water, and the sponge side to apply cleaning products. This is a versatile tool that every home should have.
- Be careful when using baking soda on plastic surfaces—it can leave scratches. Always test new cleaning products on an inconspicuous area.
- Rinse off toothpaste immediately after use – the titanium dioxide it contains can leave white stains on dark surfaces.
- Regularly wipe surfaces dry to prevent plaque buildup. This simple habit will save you hours of deep cleaning.
- Leave the door open to ventilate and prevent mold growth. Air circulation is the best preventative for dampness and unpleasant odors.
I'd also like to talk about the proper technique for applying cleaning products. Many people simply spray the product on the surface and immediately start scrubbing. This is a mistake! Any product needs to work, which takes 5 to 15 minutes depending on the degree of dirt. I always apply the product in an even layer, give it time to dissolve the dirt, and only then begin mechanical cleaning. To save time, you can treat all surfaces, starting with the dirtiest one, and then cleaning them one by one.
Prevention is better than cure
Regular, proper maintenance is an investment in the longevity of your shower enclosure. Modern materials last for decades, but only if properly maintained. I've seen enclosures that looked old and unsightly after 2-3 years due to improper maintenance, and models that retained their original appearance after 10 years thanks to regular maintenance. The difference isn't in the cost of the equipment, but in the approach to maintenance.
Remember: a clean shower enclosure is not only aesthetically pleasing but also beneficial to your family's health. A damp environment with organic contaminants is the perfect breeding ground for bacteria and fungi. Regular cleaning with the right products creates a healthy microclimate in the bathroom. Don't skimp on maintenance—these minutes will pay off in years of comfortable use and the impeccable appearance of your shower enclosure. Start cleaning from the first day of use, and you'll never have to deal with lingering stains.