








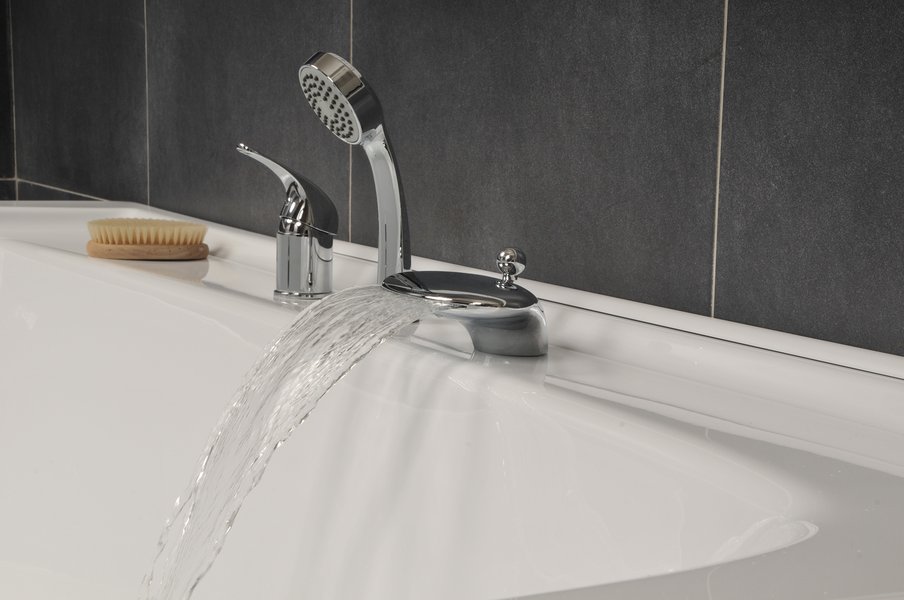
A flush-mounted faucet, mounted directly into the bathtub's surround or countertop, is a trend in modern plumbing design. It has replaced bulky wall-mounted units, offering simplicity, aesthetics, and new possibilities for organizing space. But how practical is this solution in everyday life? What pitfalls are hidden behind the pretty catalog image? And can you install it yourself? This article isn't an advertisement, but an honest analysis from a professional with years of experience who has seen both successful and unsuccessful installations. We'll discuss types, mechanics, installation, and, most importantly, long-term operation.

Design features and types of built-in mixers
The main difference from a wall-mounted faucet is the installation point and, as a result, a different plumbing arrangement. All utilities (hoses, sometimes some fittings) are hidden either under the rim of the bathtub, in the cabinet, or in a false wall. Only the spout, control handles, and, possibly, the shower head outlet remain exposed. Based on the control method, single-lever (joystick) and dual-lever models are distinguished. Single-lever models are easier to adjust temperature, while dual-lever models often have a more classic look and allow for more precise pressure control. Functionally, there are simple faucets for filling the bathtub only and combination faucets—a "bath and shower" combo. In the latter, the shower can be fixed (on a separate stand) or concealed, with the hose stored in a special compartment in or near the spout, and the shower head stored on a magnetic holder.
Waterfall faucets stand apart. Their spout is not round, but wide and flat. The water flows out not as a stream, but as a continuous, transparent sheet, creating a calming effect and virtually no noise. These models require good water pressure and are often equipped with an aeration system to ensure a smooth, splash-free water flow. Another interesting subtype is thermostatic faucets. With these, you preset the desired temperature on the dial, and an electronic or mechanical thermostat maintains it constant, regardless of pressure fluctuations in the system. This is an ideal choice for families with children or the elderly.
Materials of the case and internal filling
The material determines not only the appearance but also the durability. Budget models have bodies made of silumin (aluminum alloy) with a chrome finish. They are lightweight but fragile—the threads can break if overtightened. Brass or bronze are the best options. These alloys are heavier and more expensive, but are virtually eternal and corrosion-resistant. The finish can be chrome, matte nickel, painted enamel, or even aged copper or gold-plated. The heart of a single-lever faucet is the cartridge. Ceramic cartridges (two polished plates) and ball cartridges are available. Ceramic cartridges are considered more reliable and smoother to operate, but are sensitive to sand particles in the water. Therefore, the installation of coarse filters is essential. Two-handle faucets use valve stems: ceramic or rubber (worm gear). Ceramic cartridges are more durable, while rubber cartridges can be repaired by replacing the gasket.

- Single lever on cartridge: Convenient one-handed operation, modern design. Sensitive to water quality, repairs require only cartridge replacement.
- Two-valve with ceramic axle box: Classic design, precise adjustment, and easy to repair. Less convenient for quick opening/closing.
- Thermostatic: Maximum comfort and safety, constant temperature. High price, dependence on electricity (for electronic models).
- Waterfall mixer: Impressive appearance, quiet water flow. Requires good pressure, and is more difficult to clean from limescale.
The advantages that are sold and the disadvantages that are kept silent
The salespeople at the store will enthusiastically tell you about the main advantages. First, there's the aesthetics. The minimalist design and lack of visible pipes and wall fasteners create a clean and stylish interior. Second, there's the flexibility of layout. The bathtub can be placed anywhere in the room, without being tied to the location of the risers. Third, there's the ease of installation in an already renovated space—no need to break wall tiles for concealed plumbing. And that's all true. But there's a downside, too, which you should be aware of before purchasing.
The main drawback is repairability. If a wall-mounted faucet leaks, you can turn off the water and replace the cartridge, all while having full access. If a built-in faucet leaks, especially one installed in an acrylic bathtub, the hose connection can only be accessed from below. This often requires either removing the decorative screen or, worse, moving the bathtub itself, which is tantamount to a local repair. Another issue is the wear and tear of the shower hose in concealed models. A hose constantly bent and stored in a cramped compartment wears out faster, and you'll only notice it when a puddle forms under the bathtub. A third issue is the bathtub type limitation. Installing a faucet into a cast-iron or steel bathtub is extremely difficult; it requires a diamond drill and skill, and there's a high risk of chipping the enamel. An acrylic bathtub or a cast-stone bathtub is ideal for this purpose.
Step-by-step instructions for self-installation
If you've decided to install the bathtub yourself, be prepared for some precision work. The first and most crucial step is marking and drilling. Determine the exact location on the bathtub rim (usually 10-15 cm from the edge). Make sure there are no stiffeners or frame elements underneath. Use the template, which is usually included. Drill acrylic at low speeds and without applying excessive pressure, otherwise the material may melt or crack. It's best to use a fine-toothed wood drill bit or a special milling cutter. Place a wooden block under the drilling site for stability.

After preparing the hole, assembly follows the standard procedure. Insert the faucet body from the top, attach the sealing rubber (sometimes two – a thick and a thin one) to the bottom, then the pressure washer, and tighten the nut with an adjustable wrench. It's important not to overtighten – tighten until snug, but don't overtighten to avoid breaking the threads or crushing the acrylic. Next, connect the flexible hoses for hot and cold water. Always use new hoses, even if the old ones look fine. Wrap PTFE tape or thread around the threads and tighten with a wrench. Turn on the water and check all connections for leaks. If the faucet has a shower attachment, drill a separate, smaller hole nearby for the shower hose outlet, and secure the hose with a special decorative nut.
Important nuances when choosing and using
When purchasing, pay attention to the spout length. If the bathtub is wide (over 70 cm), a standard 15-20 cm spout may not be long enough, causing water to splash against the side. Choose models with an extended or swivel spout. Check the package contents: the shower head holder is often sold separately. Check if a decorative screen is included to conceal the mounting area underneath—it's a small but useful detail. Avoid using abrasive cleaners on chrome surfaces—use only soft sponges and special cleaning products for plumbing fixtures. Check the faucet every six months for looseness by gently tightening the bottom nut. If you have hard water, periodically disassemble and clean the aerator (the mesh at the end of the spout) to remove limescale deposits.
- Compatibility check: Make sure your bathtub allows for a recess (acrylic, cast stone). Measure the thickness of the rim.
- Installation tool: Drill, crown bit of suitable diameter, adjustable wrench, fum tape, silicone sealant.
- Force control: Tighten the fastening nuts carefully to avoid damaging the bathtub material.
- Quality of eyeliners: Don't skimp on flexible hoses. It's best to use stainless steel braided hoses marked for hot/cold water.
- Prevention: Regular cleaning of the aerator, checking of connections, use of water filters.
Alternative: stand-mounted or installation mixer
If the risk of installing a tap is intimidating but you want a modern solution, consider alternatives. A high-mounted (floor-standing) faucet offers the same visual effect of being free from walls, but with all connections located in an easily accessible stand. It can be installed next to the bathtub without drilling. Another option is concealed installation. In this case, the faucet is mounted not in the bathtub, but in the wall or a special decorative panel. Only the controls and spout are exposed, and all the mechanics are hidden in the wall, accessible through an inspection window. This is the most expensive, but also the most aesthetically pleasing and repairable of the concealed options.
A built-in faucet is a choice for design and unconventional layout solutions. It fits perfectly into a modern interior where clean lines and minimalism are essential. However, its installation requires precision, and future use requires attention to detail. If you're willing to accept some maintenance complications for the sake of a flawless appearance, and you have a suitable bathtub, then this model is a safe choice. If you prioritize hassle-free installation and easy renovation, perhaps consider classic wall-mounted or floor-mounted options. In any case, understanding all the features will allow you to make an informed choice and enjoy the result for years to come.