






Finishing walls and ceilings with PVC plastic panels is a popular solution for balconies, loggias, hallways, bathrooms, and even kitchens. The material is inexpensive, moisture-resistant, easy to clean, and available in a wide variety of colors. The classic installation method is using battens, but this eats up several centimeters of precious space. In situations where every centimeter counts, or when the walls are relatively even, adhesive installation is the ideal solution. It's faster, cleaner, and doesn't require fiddling with profiles. However, the success of the entire 90% project depends on the adhesive used to glue the PVC panels. Choosing the right adhesive is key to ensuring that the finish won't peel off within a month and will delight the eye for years to come.

The adhesive for this type of installation isn't a universal adhesive like "Moment" or PVA. These are specialized compounds designed for long-term adhesion to two challenging surfaces: smooth, often glossy, inert plastic on one side, and plaster, concrete, drywall, or old tiles on the other. It must accommodate the thermal expansion of the panels (PVC "breathes" with temperature fluctuations), withstand high humidity, maintain its properties over time, and, preferably, be white or transparent to prevent bleed-through. Furthermore, it must be thixotropic—not runny, but applied in dots or stripes, holding the panel in place until it's secured.
What should be the ideal glue for PVC?
When choosing an adhesive in the store, pay attention to several key characteristics listed on the packaging. First, adhesion (bonding strength). It should be strong on non-porous surfaces (polystyrene, PVC) and mineral substrates (concrete, plaster). Second, initial setting time. Typically, it's 5-15 minutes. This time allows you to glue the panel, align it, and adjust its position. Third, final peel strength. This is achieved in 24-72 hours.
Fourth, and very important, is elasticity after drying. A hard, brittle adhesive won't accommodate the panel's thermal expansion, and over time, peeling may occur in corners or on long walls. Fifth, moisture and mildew resistance. This is a must for bathrooms and balconies. Finally, sixth, color. For light-colored panels, white or transparent adhesives are best. Darker adhesives may show through at the joints. A good adhesive also shouldn't have a strong odor or emit harmful substances after curing.
- Type of composition: Most often, these are modified water-based polymer dispersions or synthetic resins in organic solvents. Water-based ones are less toxic but may set more slowly on smooth PVC.
- Package: Available in caulking gun tubes (300-400 ml cartridges) and buckets (1-5 kg). Tubes are convenient for small-volume jobs.
- Consumption: On average, 150-300 grams per square meter when applied with a trowel or spatula. When applied pointwise, significantly less.
- Operating temperature: Typically between +5 and +35°C. Do not apply to cold or frozen walls.

Review of popular brands and compositions
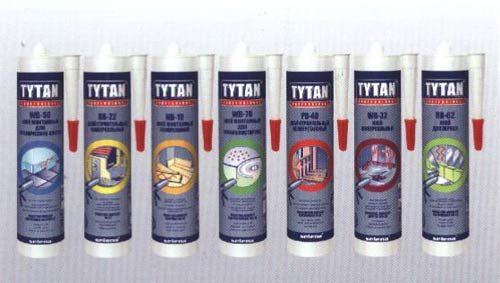
The market offers both specialized adhesives specifically for plastics and universal high-hold construction compounds. Among the specialized adhesives, the following have proven themselves to be effective: «Moment Montage for PVC and plastic - quick-setting, transparent after drying, moisture-resistant. «"Tytan Professional" for PVC and polystyrene panels - has excellent initial "stickiness", suitable for ceilings. «Kleiberit 636» — German glue based on synthetic resin, very strong and elastic, but requires wetting of one of the surfaces for activation.
A separate, large category is so-called "liquid nails." This isn't a single product, but a whole line of adhesives based on various polymers. They are excellent for spot mounting. For PVC panels, the best choices are: «Liquid Nails LN-604 (quick installation) — sets in 10 minutes, durable. «Moment Montage Superstrong Plus MP-85 - neoprene based, can withstand high loads, suitable for complex surfaces. «Macroflex MF 924» — universal, with good adhesion to plastic. Important note: some ultra-strong compounds (especially those based on synthetic rubber) may contain solvents that can "eat through" thin or low-quality PVC. Test on a scrap piece.
Preparing the base: a foundation for a reliable finish
No matter how expensive and high-quality the adhesive, it won't work if the substrate isn't prepared. Plastic panels are lightweight, but require a strong support. The first step is assessment. If the wall is relatively level (no more than 5 mm difference over 2 meters), dry, and strong, you can glue it directly. If there's old wallpaper, poorly adhering paint, or crumbling plaster, all of this must be removed. The adhesive will bond to this weak layer, not the substrate, and it will eventually fall off along with your new finish.
The second step is cleaning and degreasing. Once the wall is free of debris, thoroughly vacuum or sweep away dust. Then, if you suspect grease stains (in the kitchen), wipe them with a degreaser. The third step is priming. This is a must! Primer (preferably a deep-penetrating primer for mineral substrates) will bind any remaining dust, strengthen the surface layer, reduce absorption, and improve adhesive adhesion. Allow the primer to dry completely according to the instructions. While the wall is drying, prepare the panels: unpack them, allow them to acclimate in the room for at least 24 hours, and cut them to size.
Installation technology: glue, pressure, control
Installation should always begin from the corner, having first installed a starting profile or an internal corner. The adhesive is applied to the back of the panel. The application method depends on the wall's condition. For a perfectly flat wall, a thin, continuous layer can be applied with a notched trowel (4-6 mm notch). For walls with minor irregularities, it's better to apply the adhesive in "blobs" or stripes around the perimeter and in the center. This creates a kind of "shock absorbing pillar" that compensates for any differences in surface texture.
After applying the adhesive, place the panel on the wall and immediately level it. Then press it firmly over the entire surface. This can be done with a rubber roller, a wide, soft-grip spatula, or simply with your palms, smoothing from the center outward. It's important to remove any air bubbles. Any excess adhesive that appears at the edges should be immediately removed with a damp cloth. Insert the next panel into the groove of the previous one and repeat the process. After installing 3-4 panels, check their flatness and plumbness again with a level.

Special cases and common mistakes
Some situations require a special approach. For example, ceiling mounting. Here, it's critical to use an adhesive with a very short initial setting time and high initial tack. Once pressed, the panel should adhere almost instantly. Often, for ceilings, a few drops of Super Moment (cyanoacrylate) adhesive are added to the center of the panel for immediate adhesion, while a specialized adhesive around the perimeter carries the main load. However, be careful with superglue—it stains.
Another situation is installation in an unheated space (balcony, loggia). Here, it's important to use not only a moisture-resistant adhesive but also a frost-resistant one that won't crack after several freeze-thaw cycles. Also, in cold conditions, the curing time increases. Common mistakes made by beginners include: applying too little adhesive or, conversely, applying it too thickly (which increases drying time and can lead to slippage). Unevenly pressed panels result in visible ripples. Not allowing the panels to cure properly results in them being used before 24 hours have passed. Installation on a damp primer is common.
- If the wall is very uneven: Don't try to level it with a thick layer of glue. It's better to take the time and install a thin, leveled frame made of galvanized profile or wooden slats. Then glue the panels to this. It's more reliable.
- Dismantling: Removing a glued-on panel without damaging it is a nearly impossible task. Typically, the panel is cut with a knife and torn off in sections. The base is then cleaned of adhesive residue with a putty knife or sander.
- Joints and corners: To seal joints in the bathroom, especially where they meet the bathtub or shower tray, use a PVC-compatible silicone sealant. Adhesives are not suitable for this purpose.
- Ventilation: During work and for 24 hours afterwards, ensure good ventilation of the room, but avoid drafts that can dry the glue too quickly before polymerization.
In conclusion, installing PVC panels with adhesive is an excellent way to achieve a neat, durable, and moisture-resistant finish with minimal space loss. The key to success lies in careful substrate preparation, choosing the right, specialized adhesive, and meticulously following all steps. Take your time, allow the adhesive to fully harden, and your walls and ceilings will delight you for many years to come, requiring little maintenance.