








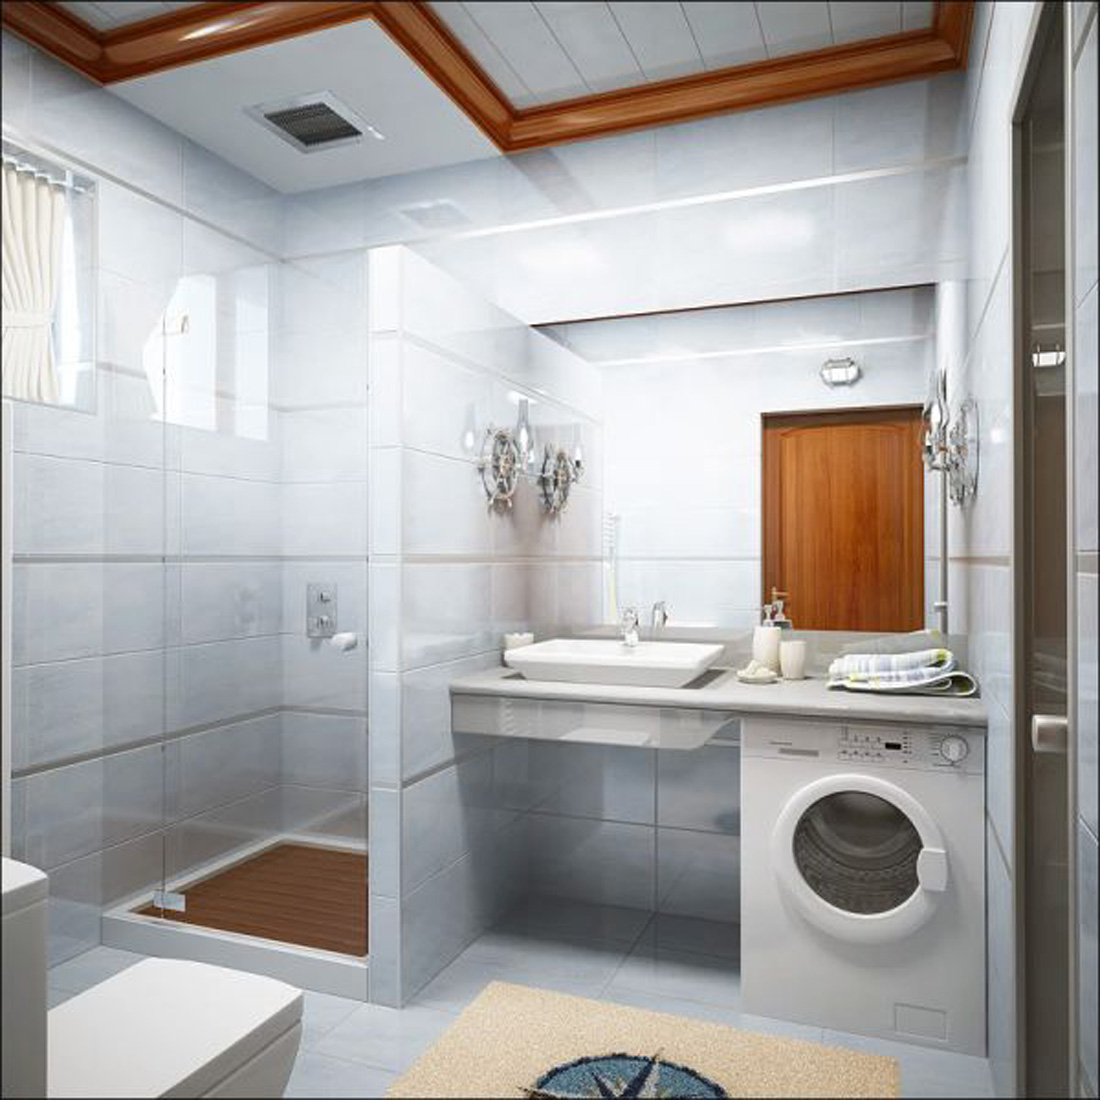
The compact layout of bathrooms in typical apartments often presents a difficult challenge: how to accommodate all the necessary appliances and plumbing fixtures without turning the room into a walk-through yard? One of the most ergonomic and stylish solutions is to combine the sink and washing machine into a single unit, installing the sink on a wide countertop with the washing machine hidden underneath. This approach not only saves precious space but also creates additional useful horizontal surface area for displaying cosmetics, toiletries, or simply placing a flower. However, implementing this idea involves a number of technical nuances that must be considered even during the renovation planning stage.
The first and most important thing is choosing a washing machine. Not every model is suitable for undercounter installation. You need a front-loading machine and, crucially, one with a top panel designed to withstand static loads. Standard machines have a thin plastic or enamel lid, which is not designed to support a heavy countertop with a sink. Manufacturers that produce built-in appliances specifically reinforce this panel. Look for the specifications for "undercounter installation" or "built-in." Typically, such models are exactly 82 cm high (the standard height of kitchen counters), which matches the height of the vanity unit perfectly. The width and depth are standard (60 x 55 cm).
The second key element is the countertop itself. It must be exceptionally moisture-resistant and resistant to mechanical impact. The best materials for the bathroom include engineered stone (acrylic or quartz agglomerate), porcelain stoneware, moisture-resistant MDF with a plastic coating (postforming), or solid wood treated with special impregnations. The countertop thickness should be at least 28-40 mm for stone and 28-38 mm for MDF. It should not simply have a cutout for the sink, but a special mounting profile or a pre-selected rebate for installing a so-called "surface-mounted" or "integrated" sink. The edge of the countertop facing the user is usually designed with a rounded or teardrop-shaped overhang (drip tray) to prevent water from running onto the cabinet fronts and floor.

Design options: open and closed installation
Depending on the design and your preferences, an undercounter washing machine can be either exposed or concealed behind cabinetry. Each option has its advantages and disadvantages.
Open installation is a simpler and more cost-effective option. The machine simply rolls under the countertop in its original location. The countertop rests on the side walls of the cabinet or on special metal support legs installed on either side of the appliance. Pros: easy access to the machine for connection, maintenance, and repairs. Good ventilation. Cons: not the most aesthetically pleasing appearance, as the end of the machine is visible. Also, dust and water splashes will fall on the top panel of the appliance. To conceal the gap between the machine and the countertop, a decorative plastic or rubber apron is often used.
Concealed installation (fully integrated) – the washing machine is hidden behind the cabinet fronts, creating a seamless unit with the cabinets. A special installation kit is used for this: a mounting plate that secures the machine to the countertop from below to prevent movement during the spin cycle, and hinges for hanging the front directly on the machine door. The front can match all the cabinets, creating the illusion of a single, continuous wall unit. Pros: impeccable appearance, protection of the appliance from dust and moisture. Cons: cost (requires a special machine and fittings), more difficult access for repairs, and the need for ventilation gaps in the front or side walls to prevent the machine from overheating.

Selecting and installing a sink: integrated vs consignment note
The sink is an equally important element for such a unit. It should not only be beautiful but also comfortable, considering that it will be installed higher than standard height (due to the dishwasher underneath). The standard height for a sink is 85-90 cm from the floor. When installed above the dishwasher, the bottom height of the countertop will be 82-85 cm, plus the thickness of the countertop and the sink itself. As a result, the sink's rim can reach 95-100 cm. This is too high for children and not very comfortable for people of average height. Therefore, flatter, wider sinks are often chosen.
Sinks are classified into three types based on their mounting method. The overhead (or drop-in) type is the easiest to install. It has a pronounced edge around the entire perimeter that fits onto the countertop. The joint is sealed with silicone. Pros: Can be used with any countertop material and is easy to replace. Cons: It creates a protruding edge that can be bumped into and a step where dirt accumulates.
Integrated (undermount) – the sink fits into a cutout in the countertop so that its top edge is flush with the surface or 1-2 mm lower. It is secured from below with special clips. Pros: smooth, seamless surface, easier cleaning, modern appearance. Cons: more difficult to install, requires a perfectly precise cutout, and is not suitable for all countertop materials (for example, for engineered stone, only integrated installation with glue-down is used).
Undermount (undercounter) – the edge of the sink is completely hidden beneath the countertop, leaving only the bowl visible. This is the most elegant and expensive option, requiring a special finish on the countertop edge. It's most commonly used in kitchens, but it also looks stunning in a bathroom.

Step-by-step installation and connection plan
Implementing a sink-countertop-washing machine project requires careful preparation and sequencing. It's best to complete the work during the rough-in phase of the bathroom, when the walls are bare and all utilities are accessible.
Step 1: Planning and arranging the utilities. Determine the exact location of the unit. Mark the walls: where the washing machine will be, where the countertop will be, and where the center of the sink will be. Relocate the water and wastewater connections. A washing machine requires a grounded outlet (IP44, if in a splash zone), a cold water tap with a ¾-inch outlet, and a trap or separate wastewater outlet with a socket at least 60 cm above the floor (to prevent the drain hose from sagging). A sink requires hot and cold water connections, a trap, and a wastewater outlet. It's a good idea to install a separate, easily accessible valve for the washing machine (for example, in an adjacent cabinet) so you can quickly shut off the water in case of a leak.
Step 2: Assemble the frame (base) for the countertop. This can be a metal frame made of profiled wood, secured to the walls and floor, or a cabinet made of moisture-resistant laminated chipboard. The frame must be extremely rigid and able to support the weight of the countertop and sink, the weight of the machine in operation (including vibration), and the weight of a person leaning on the countertop. Be sure to leave at least 1-2 cm of clearance on the sides of the niche for the machine to allow for air circulation and vibration compensation. The top surface of the frame must be strictly horizontal.
Step 3: Install the countertop and sink. Place the countertop on the frame, align it, and secure it from the inside with screws (not through!). If the countertop is made of engineered stone, it should also be secured with mounting adhesive. Then install the sink according to the instructions: for a countertop, use silicone, and for a drop-in sink, use clips and sealant. Immediately install the faucet and connect it to the water supply.

Features of sewer connection and condensation control
The most difficult part is organizing the drainage. You have two appliances (a sink and a washing machine) that need to be connected to the same sewer pipe. The drainage from the washing machine must be organized correctly, otherwise, water could backflow from the sink's trap into the washing machine, or vice versa.
The ideal solution is to install separate traps with separate inlets for each appliance, which are then combined into a single outlet. There are special combination traps for sinks with a second inlet for the washing machine. An important rule: the drain hose of the washing machine should enter the sewer from the top down, creating a so-called "backflow loop." The height of the hose entry into the trap or separate outlet should be at least 60 cm from the floor, and the hose itself should not sag for the last 50-60 cm before the entry—this will prevent backflow of water during draining. Never insert the washing machine hose directly into the sewer pipe without a trap—this will cause odors to spread.
Another problem is condensation. A washing machine, especially when running hot, generates a lot of heat and moisture. If it's in a closed, unventilated space, this can lead to condensation forming on the interior walls of the cabinets and even under the countertop. Be sure to provide ventilation grilles or gaps in the cabinet fronts, and treat all interior surfaces with a moisture-resistant primer or special paint. Installing a small forced-air fan built into the base of the cabinet helps a lot.
- Carefully measure all dimensions: the height of the machine with legs, the depth of the countertop, the height of the sink.
- Ensure free movement for loading laundry into the machine - there should be at least 50-60 cm of free space in front of it.
- Make sure that the countertop protrudes at least 5-7 cm above the front panel of the machine to protect against splashes.
- Use only certified and grounded outlets to connect the washing machine.
- Before final assembly, conduct a test run: check the drain and water intake in the machine, the operation of the faucet and the sink drain for leaks.

Bottom line: combining the sink and washing machine under a common countertop is smartA solution for small and medium-sized bathrooms. It maximizes space, adds a convenient work surface, and creates a cohesive, neat look. Success depends on three components: the right choice of appliances (a special built-in machine), high-quality materials for the countertop and cabinet, and proper installation with an emphasis on water and electrical safety. If done correctly, this design will serve you for many years, demonstrating its practicality and ergonomics daily.
