








Liquid acrylic as a modern solution for restoring old bathtubs
Many people face the problem of their aging cast iron or steel bathtubs. The surface loses its smoothness, and scratches, yellowing, and even rust appear. Completely replacing the plumbing is a costly and messy process, requiring dismantling and subsequent renovation of the entire room. An alternative that has become increasingly popular in recent years is bathtub restoration with liquid acrylic, also known as stacryl. This method allows you to transform an old bathtub in just a few hours, restoring not only its aesthetic appearance but also its functionality. This technology came to Russia from Europe and America in the early 2000s and has since undergone significant improvements.
The method involves applying a special two-component compound—liquid acrylic and a hardener—to the prepared bathtub surface. The resulting chemical reaction polymerizes, forming a solid, durable, and smooth coating up to 4-6 millimeters thick on the bathtub. The result is a kind of "new bathtub" within the old one. Modern domestic manufacturers, relying on research from specialized institutes, have learned to produce high-quality compounds that fully comply with hygienic and technical standards. Unlike conventional enamels, which often crack and peel, self-leveling acrylic creates a monolithic, moisture-resistant, and durable film.
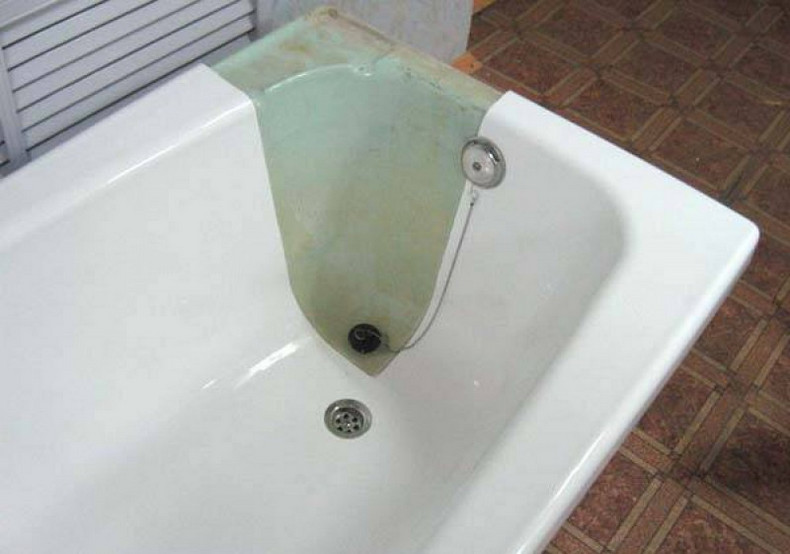
What is better: buying a new bathtub or restoring it with stacryl?
Before starting work, a dilemma naturally arises: is it worth investing time and money in restoring old plumbing fixtures or is it easier to buy new ones? Several key factors need to be weighed. The financial aspect is obvious: even the most expensive restoration kit will cost several times less than a new, high-quality bathtub, not to mention the cost of installation, possible replacement of utilities, and repair of the casing.
The time investment is also disproportionate. Restoration takes one to two days of intensive work, after which the bathtub must be off-limits for about a week to allow the coating to fully cure. Installing a new bathtub, especially with the help of plumbers and tilers, can take weeks. Furthermore, dismantling an old, heavy cast-iron tub creates dust, dirt, and the risk of damaging the drain outlet, floor, and wall tiles. Restoration, on the other hand, is carried out on-site, without any major physical intervention in the structure of the room.
The aesthetic result of a restoration can be even better than that of a new enameled steel bathtub. The acrylic coating is warmer to the touch, retains water heat better, and has high impact strength, reducing the risk of chipping from heavy objects dropped on it. You can choose not only the standard white but also any shade from the manufacturer's palette to seamlessly integrate your renovated bathtub into your interior.
- Budget savings: The cost of materials for do-it-yourself work starts from 3,000 rubles, professional restoration – from 6,000 rubles.
- Preserving the finish: There is no need to knock down tiles or break the floor for dismantling.
- Durability: A high-quality applied coating lasts 10-15 years, not inferior to new products.
- Hygiene: The seamless surface prevents the growth of bacteria and fungi.
- Thermal insulation: Acrylic retains water heat better than metal or cast iron.
Detailed instructions for DIY bathtub restoration
Successful work with 80% depends on the quality of surface preparation. The coating won't hide deep chips and imperfections, and poorly removed rust will show up as stains over time. Therefore, the preparation stage requires maximum attention and time.
Preparatory stage: creating the perfect base
- Cleaning the old coating. The entire interior surface of the bathtub should be sanded with coarse sandpaper (P80-P120 grit) or a sanding machine with an abrasive wheel. The goal is to completely remove the old gloss, film, and traces of detergents, and create a rough surface for better adhesion of the new coat. After sanding, thoroughly rinse off any dust with water.
- Elimination of corrosion and defects. Areas with red rust are sanded down to bare metal. A rust converter is then applied according to the instructions (usually left on for 20-30 minutes). The area is then sanded again. Deep chips and cracks are filled with a special metal filler or epoxy resin, and after drying, they are sanded flush with the surface.
- Degreasing. This is a critical step. After mechanical cleaning, the entire bowl should be thoroughly rinsed and wiped with a solvent (white spirit, acetone) to remove any traces of grease, soap, and dust. Wear gloves when cleaning to avoid leaving fingerprints.
- Heating the bath. To ensure the mixture flows better and improves adhesion, it's recommended to preheat the bathtub. Fill it with hot water (60-70 degrees Celsius) for 30-40 minutes, then drain and wipe dry with a clean, lint-free cloth. The surface must be completely clean, dry, and matte.

The main stage: preparation and application of acrylic
The room should be well-ventilated, with an air temperature of at least 18°C. Use a 10-15 cm wide natural bristle brush or a special roller for self-leveling floors. Wear a respirator, goggles, and gloves when performing all work.
- Preparing the mixture. Follow the packaging instructions carefully. Typically, liquid acrylic (component A) is thoroughly mixed in its container, then the required amount of hardener (component B) is added. Mix the components for at least 3-5 minutes until the mixture is completely smooth and streak-free. Do not mix the entire batch at once if you are unsure of how quickly you can work; the mixture begins to thicken after 20-40 minutes.
- Application technique. Begin pouring the mixture onto the edge of the bathtub farthest from the drain. Using a brush or roller, immediately begin spreading the mixture along the walls in even, circular motions. Avoid drips. The key principle is "wet on wet": coat the next section before the previous one has begun to set. Coat the bottom last. Try to apply the coating in one go to avoid visible seams.
- Drying and polymerization. After application, leave the bathtub undisturbed for 24-48 hours. Do not use it for the first week. Full curing and strength development occur within 7 days. During this period, it is important to ensure a stable temperature and a dust-free environment.
Alternative recovery methods and working with professionals
In addition to liquid acrylic, there's also the option of installing an acrylic liner. This is a prefabricated acrylic sheet basin, manufactured to the exact dimensions of your existing bathtub and glued into place. This method is more expensive (starting at 15,000 rubles), but it has advantages: no chemicals are required, the surface is perfectly smooth to begin with, and the acrylic liner itself is more impact-resistant. However, installation often requires trimming and precise fitting, as well as the use of a special foam adhesive.
If you're unsure of your abilities, consider professional restoration. A good technician will complete the job in 4-6 hours, offer a guarantee on the results (usually 3-5 years), and use professional materials and tools, including spray equipment for a perfectly even finish. The cost of services ranges from 6,000 to 15,000 rubles, depending on the region, the condition of the bathtub, and the materials used. When choosing a contractor, be sure to review their portfolio of completed work and read real reviews.
Whatever method you choose, proper care will prolong the life of your renovated surface. Use soft sponges and non-abrasive, chlorine- and acid-free cleaners. Avoid dropping heavy metal objects. If you follow these guidelines, your restored bathtub will last for many years, saving you money and delighting you with its impeccable appearance.